Tuesday, July 19, 2011

I spent the whole weekend making a scratching post...

This weekend I started a project that was a bit out of my real of expertise.  I finished the project, and while I am extremely pleased with the results, I will never attempt something like this ever again.  I give you the epic journey that was...THE CAT TOWER!


It all started a few weeks ago when I thought that it might be a nice little project--you know something that the kitties (not to be confused with kiddies) would enjoy.  My mom was supportive. She offered up something like, "well, sure we can!"  I did some research and decided that this project was the winner.  I'm really happy with the finished results, but this pattern was very confusing and it definitely made you work for your cat tower.

Step 1: Get supplies.  Nick and I ventured up to Tacoma on Friday night to Lowes hardware store.  A nice young man named Garrett helped cut all the wood we needed.  I hadn't been to Lowes in quite some time.  It was very overwhelming--it's a big store and I didn't know what lag screws were.

$95 later...don't judge.

Step 2: Drive back to Tacoma the next morning and spend a lot of time figure out how to begin.  Eventually you realize that you need to screw the posts together and drill some holes into your base board.  There's some recess bits involved and some washers, screws, drills, and screwdrivers.  I also used some wood glue.

Wood.

One completed stand.

Completed perch posts.

Step 3:  Carpet your base.  I chose a nice indoor/outdoor blend that I think the cats will fancy just fine.  This is really a two-person-job.  One person needs to pull the carpet tight and then the other person uses the staple gun to secure the carpet.

That would be the carpeted base (2x2).

Step 4: You have to cut out the bottom screw holes that you would have made earlier.  These have to be accessible to attach your perch posts.  After you drill the holes, you use a recess drill bit (3/4 inches) so that the tops of the screw don't scratch your floor.

Cut out the holes you drilled using that there blue/black carpet cutter.

Step 5:  There's a shelf in the pattern as well.  It suggests clamping it in place first, making sure it's level, and then securing it with wood screws.

Level!

Step 6:  Cut the tops to the perches.  The perches are compressed cardboard forms used in the creation of cement pipes.  It comes in one length at Lowes.  I think it was around $8.  You need to cut it down to 22 inches.  I used a circular saw. You want to cut the tube into thirds.

Sono tube.

Step 7: After your perch tops are cut, you need to cover them in the indoor/outdoor carpeting.  I found that a spray adhesive works best--mine came from the craft store.  Measure the length you'll need to cover top and bottom, mark the carpet, and cut it.  Then you'll spray both the perch and the carpet with the adhesive.  Then you'll use your staple gun and make sure everything is extra secure.


Step 8: After all the perches are covered, I decided to add some trim to the edges to help keep the carpet from fraying.  I used thick ribbon from the craft store and hot glued it in place.

Ribbon trim.

Step 9: Secure the perches to the stand using two screws on each side.  Now it's time to introduce the cat castle to the cats!


Word to the wise...buy one in the store.  There's a reason they're so expensive; they're a lot of work.

Friday, July 15, 2011

Hello, bordello.

Or more appropriately, bordello museum, which would make it, of course, a defunct bordello. Wow, those two words are super-depressing together. Not that an operating bordello is something to get ecstatic about, but what do you picture when you read defunct bordello? 


Something along these lines, perhaps?


The ladies stayed for four months at a time and then
moved to another brothel. A sex worker circuit, if you will.


I bet it is.


All this was left by the ladies. Not the mannequins and packing peanut- simulated bubble bath, but everything else. Yes, that includes sheets, Mr. Bubble, and lingerie, which the mannequins now wear. 


So, yeah. This is the Oasis Bordello Museum in Wallace, ID. Catherine and I went for a visit last Saturday. It was...creepy. Honestly, I don't know what I expected. Well, I think I expected it to be creepy in a way that didn't actually creep me out as much as it ended up creeping me out. Creepy-funny, not creepy-think-about-it-while-trying-to-fall-asleep-and-being-incredibly-disturbed. It was so very much the latter in this instance. 


The bordello operated until 1988--it stopped because the FBI set up shop in town to investigate the crooked sheriff. But before all that came to pass, the ladies of the evening made a tidy profit (around a 100K/year, according to our guide) serving up to 40 gents a night. All right, calling them gents is bit of a stretch. I believe Catherine called them dirty husbands...as in, "Can you imagine your dirty husband getting his paycheck and going there before coming home?" I think we all can. 


The dirty husbands entered through this door. 


While Catherine had the good sense to ask about condom usage--there were regulations in the 1980s, but they were not enforced--we really wanted to know about the doctoring. There was a weekly exam and blood work, but we were skeptical about the regulation of this, too. And what about the STDs and pregnancies from the unenforced condom policy? Good questions, which we did not ask. Not because we were shy (we did ask to have the sex menu decoded and now know what the half and half option entailed), but because we got the sense our lackadaisical guide would not know the answer. We preferred to come up with the answers on our own--our imaginations are quite thorough.  


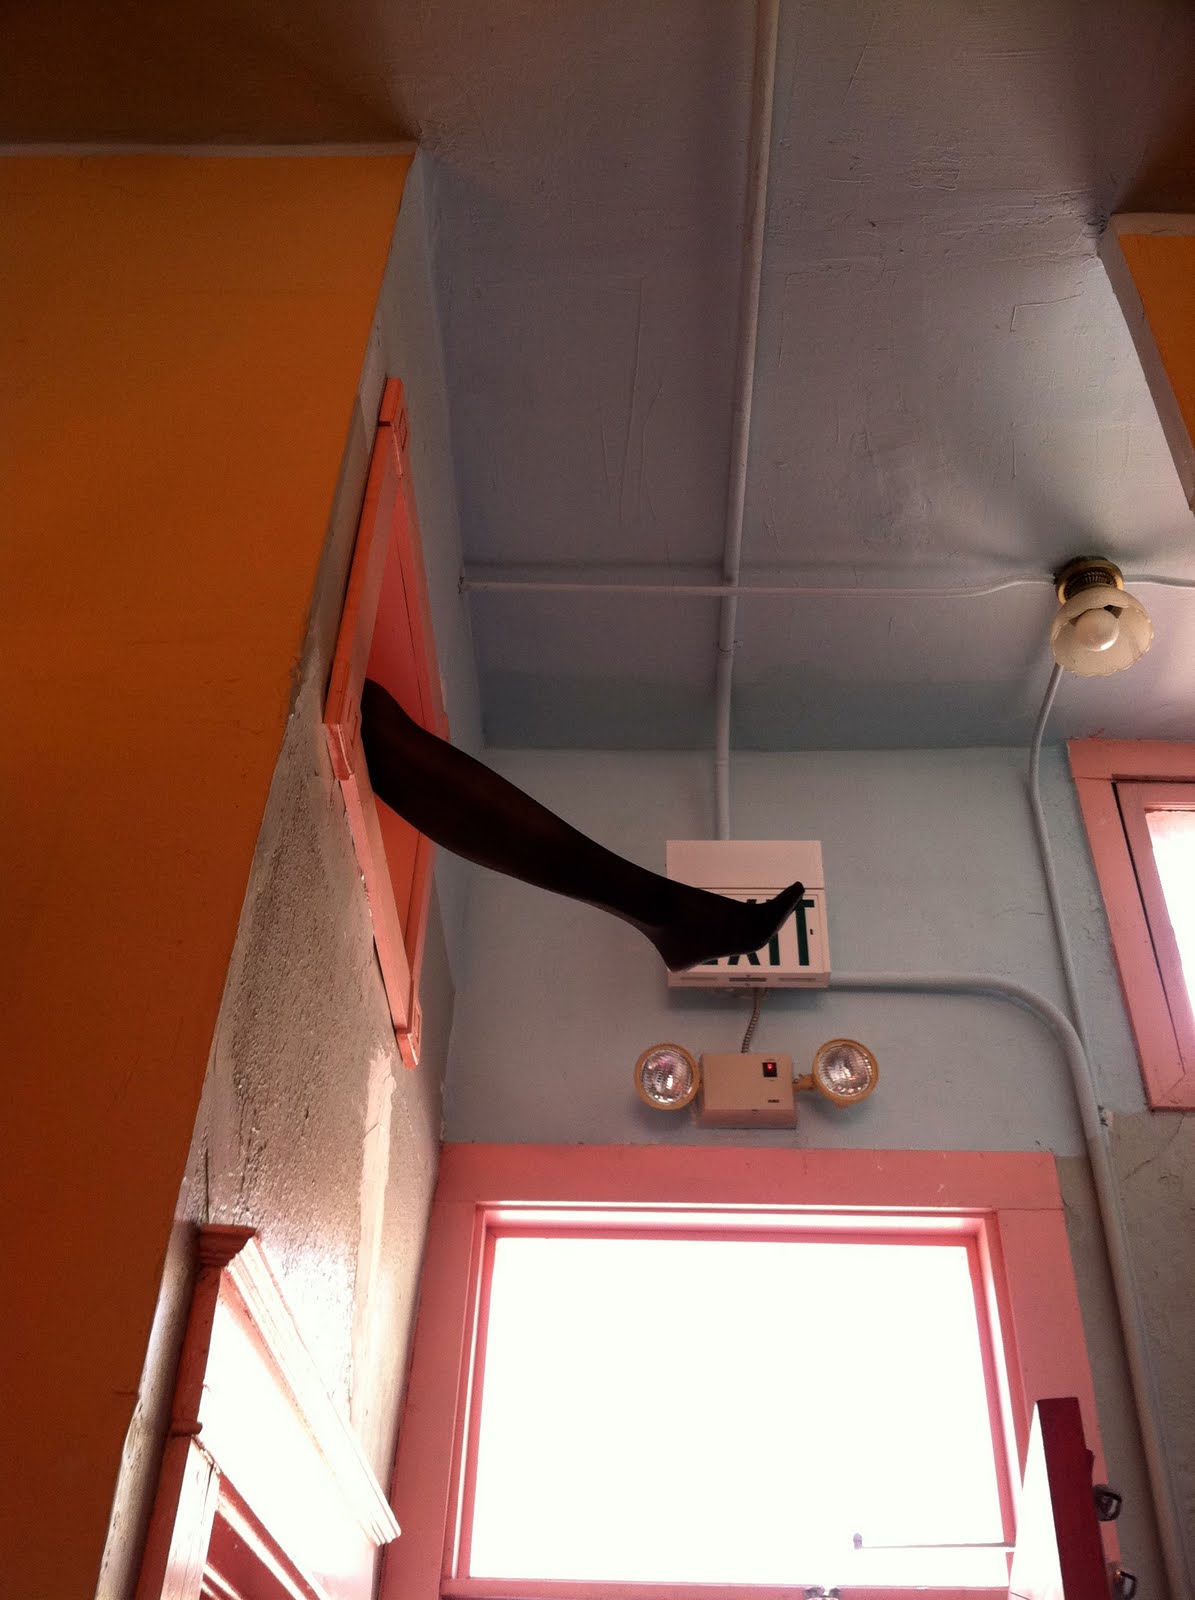
However, we couldn't come up with an explanation for this. 


It's just an extra mannequin leg. Whatever. 


I can sum the experience up thusly: it was like going to the 4H tent at the county fair and seeing the cow with the visible stomach (You know, the window?). It's a learning experience, but it's also gross, and somehow sordid, and really doesn't seem as acceptable as it once was. 


Do not rent a room here. 


The term for cow windowing is cannulation, by the way. Did you think you were going to learn that today? I certainly didn't. You're welcome. 

Thursday, July 14, 2011

kitty cousins

Hey, did you notice our new badge? It's courtesy of The Itty Bitty Kitty Committee. We're fans of the IBKC: big time.

Point number one: The headmistress of the IBKC blog, Laurie Cinotto, is a Tacoma resident and a super-talented crafter. To check out her craft blog, Laurie Cinotto: art and craft, mosey on over here.


Catherine's kitty, Genevieve, loves all kittens
(except for the one she lives with...Peanut).

Point number two: KITTENS! Yup, sweet babies: every day in every way. Laurie and her husband, Craig, foster orphaned kittens for the Tacoma/Pierce County Humane Society. The kittens (sometimes in singles, more often in families) stay with Laurie until they're old enough for adoption. So many success stories! It just makes us giddy beyond belief. 

Penelope, aka Peanut, wants to be Genevieve's BFF. 

Point number three: Dedication. Laurie gives bunches and bunches of her time at home (kittens are hard work!), keeps the blog updated, and participates in the Humane Society's annual fundraiser, which is in progress right now (hint, hint!). We really admire her selfless, good-hearted nature...and her kitten wrangling skills. Oh, she has skills like you wouldn't believe. 

Mom's kitty, Bruno, loves kittens, too.

If you'd like to add an Itty Bitty Kitty Committee badge to you blog, follow this link. You'll be pleased to know there are several to choose from. 


If you're intrigued by all this talk of kittens and would like to donate to this year's fundraiser-- over $40,000 has been raised in the past couple weeks through the IBKC alone! So awesome!--you can go here for details. 


Matilda definitely loves kittens (because she was once a kitten mom)!


Also, you should know that a new batch of kittens has just arrived at Laurie and Craig's. Eeeeek! Now would be a great time to check in on them.

Wednesday, July 13, 2011

The back of the wet dolphin project is finished!

As you may remember, I have been working on my little sweater endeavor from the latest Vogue Knitting Magazine (holla).  I mentioned in this post (which I appropriated titled wet dolphins) that the color of the yarn reminds me of...yup, wet dolphins.

I've been trying to give a little update each week on the progress I've been making.  This week I hit a milestone in the hand-knit sweater biz--I finished the back of the sweater.  I immediately cast on the left front and have been working on the 4 inch ribbed border.  I'm probably 3 inches in now.

I didn't take pictures until it was well after 8:00 this evening, so they turned out a little dark.  You can also check my Ravelry for an update.


Now back to working away on the left front side.  

I can tell that we are gonna be friends.

Really we are. I have a sense for these things. 

Catherine and I did a little friendship braceleting in Manito Park during her visit. The last time I made friendship bracelets was on the bus ride to Ford Middle School in Tacoma. Ahhh, memories. Those friendship bracelets were made using the slipknot method, while these bracelets are more traditional and a bit...let's call it technically demanding. 


The orange fade bracelet is an example of the slipknot method. 


As it is with most things, Catherine got the gist of the process in two shakes. 
I tied knots halfheartedly for maybe an hour total and then just sort of spent the rest of the time lying on the blanket. 


Here's Catherine hard at work on her chevrons. 

Here's the bracelet I dicked up like five times. 


If you're utterly baffled by how Catherine turned 24 inches of embroidery floss into a sweet chevron bracelet, Molly of The Purl Bee has a great (and easy to follow, despite my initial sluggishness) tutorial with all kinds of patterns, which you can find here. 


Since I seem to find it difficult to commit to 24 inches worth of tied knots, I decided to attempt a ring. That was 12 inches worth of commitment, much more manageable. And I'll tell you this for free: err on the side of longer floss. You can always cut some away, but you will find it difficult as all get-out to add length.


Success!


To finish, I knotted each end, trimmed the excess floss, and sewed the knots together in a snug little embrace. The two knots actually look pretty cool, too...if you want to wear the ring knot side up. I should have taken a picture of that but didn't. Terrible. 


So yeah, celebrate the knot. Try it up top. You can always turn it under, like those girls who turn their rings under so their diamonds will cut your face in a fight. I don't actually know any of those girls, but I do know of them. Forget all that, because the friendship bracelet will bring us together. 

Tuesday, July 12, 2011

lady business

As in ladybugs. That's right, I discovered aphids on my lettuce, basil, and tomato leaves this year. No good. On the upside, I found a local purveyor of ladybugs. So, I ended up with 1500 ladybugs, which I decided to release in two separate batches. If you haven't had the pleasure of releasing roughly 750 ladybugs, let me tell you it's a bit of an adventure...especially when you add the fact that ladybugs should be released in the dark (they're more sluggish and inclined to settle in and lay some eggs before departing). The other thing is that you're going to end up carrying hitchhiking ladybugs to bed and work. Just accept it.  


This one came to work with me. It crawled inside my printer.
I was like, "No, no, no, no, no!" No worries. It emerged unscathed. 

The ladybugs hang out in this mesh bag, which is kept in the fridge until you're ready to put them to work. 

They go everywhere: pots, watering cans, hands, hair, and so on. 

But they also find their way to some actual plants. 

Hooray! 


Lucky for me, the second round of ladybug release took place while Catherine was visiting. She was initially resistant to participating, but once the ladybugs woke up, she took over and released them all. And I only found one ladybug in the house afterwards! Let that be a lesson to you: release ladybugs with a sister. 
Related Posts Plugin for WordPress, Blogger...