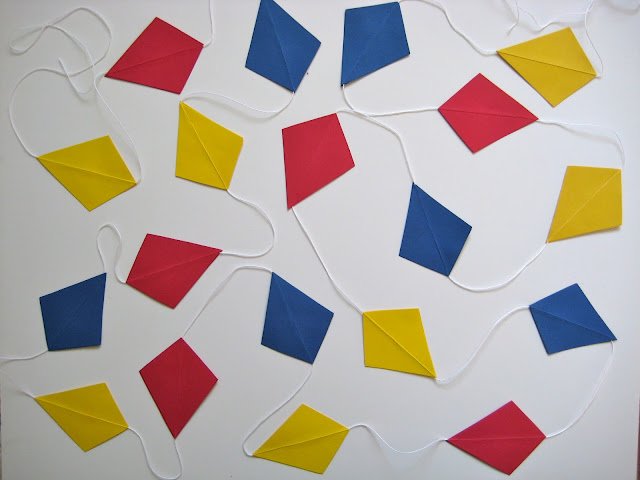
Yes, a kite garland. The perfect combination of paper and string, geometric shapes, and primary colors. It's just suddenly so spring-like, I was compelled to create something cheery...
Bear in mind, all the cutting and gluing is time intensive and can become, after a while, rather disheartening. But that's all forgotten once your garland begins to take shape.
Supplies: colored cardstock, glue stick, scissors, string
Cut that diamond out.
Ta-da! You have a paper kite. The string will go in between two of these, so make more. Many, many more.
In different colors, if you like. My color rotation started and ended with yellow. So, I have 7 yellow kites (14 kite cut-outs) and six each of the blue and red kites (12 kite cut-outs each).
Save your scraps because you'll use them to make the kite bows.
Fold one of the scraps and draw three different sized triangles.
You now have bows! They are, by far, the most annoying step in this project. Make a bunch of them. I rotated the colors here too. The red bows would go with the yellow kites (so 14 red bow cut-outs of each size); the blue bows would go with the red kites (12 blue bows of each size), and the yellow bows would go with the blue kites (12 yellow bows of each size). Confusing? Don't worry--it makes more sense when it's in front of you.
Keep them separated according to size.
Back to the kites: apply glue to each kite piece.
And make a kite sandwich. Continue until you've run through all your kite pieces, leaving a space of 3-4 inches between each kite.
I went for a yellow, blue, red color arrangement.
Make slipknots at either end of your string.
This garland tangles easily, so keeping the kites orderly is a good plan. Glue the bows just as you did the kites. I forgot to take a picture of that, but I'm sure you can figure it out. I arranged my bows in descending order (largest to smallest) just after the bottom of each kite.
Wunderbar!


No comments:
Post a Comment