

Mary Poppins, Chitty Chitty Bang Bang, and I love hot air balloons! Even though in Mary Poppins no one sings about hot air ballons, they do sing about kites, and hot air balloons go to higher heights than kites--so I think it's fitting to invoke those movies. Also, does anyone else remember in Chitty Chitty Bang Bang when Grandpa Potts sets to the skies in his little house?

Cardboard spheres found at Michaels craft store for around $1.30 each. You can get really creative with your balloon's decoration. The sky's the limit!

I chose to paint primary colors using a high gloss acrylic paint.

You will need some yarn or twine to construct your basket and to connect the basket to the balloon. I used this variative brown yarn by Sugar n' Cream.

You'll also need some fine wire to create a frame around which you'll weave the basket. This wire can be found at any craft store which sells jewelry supplies.

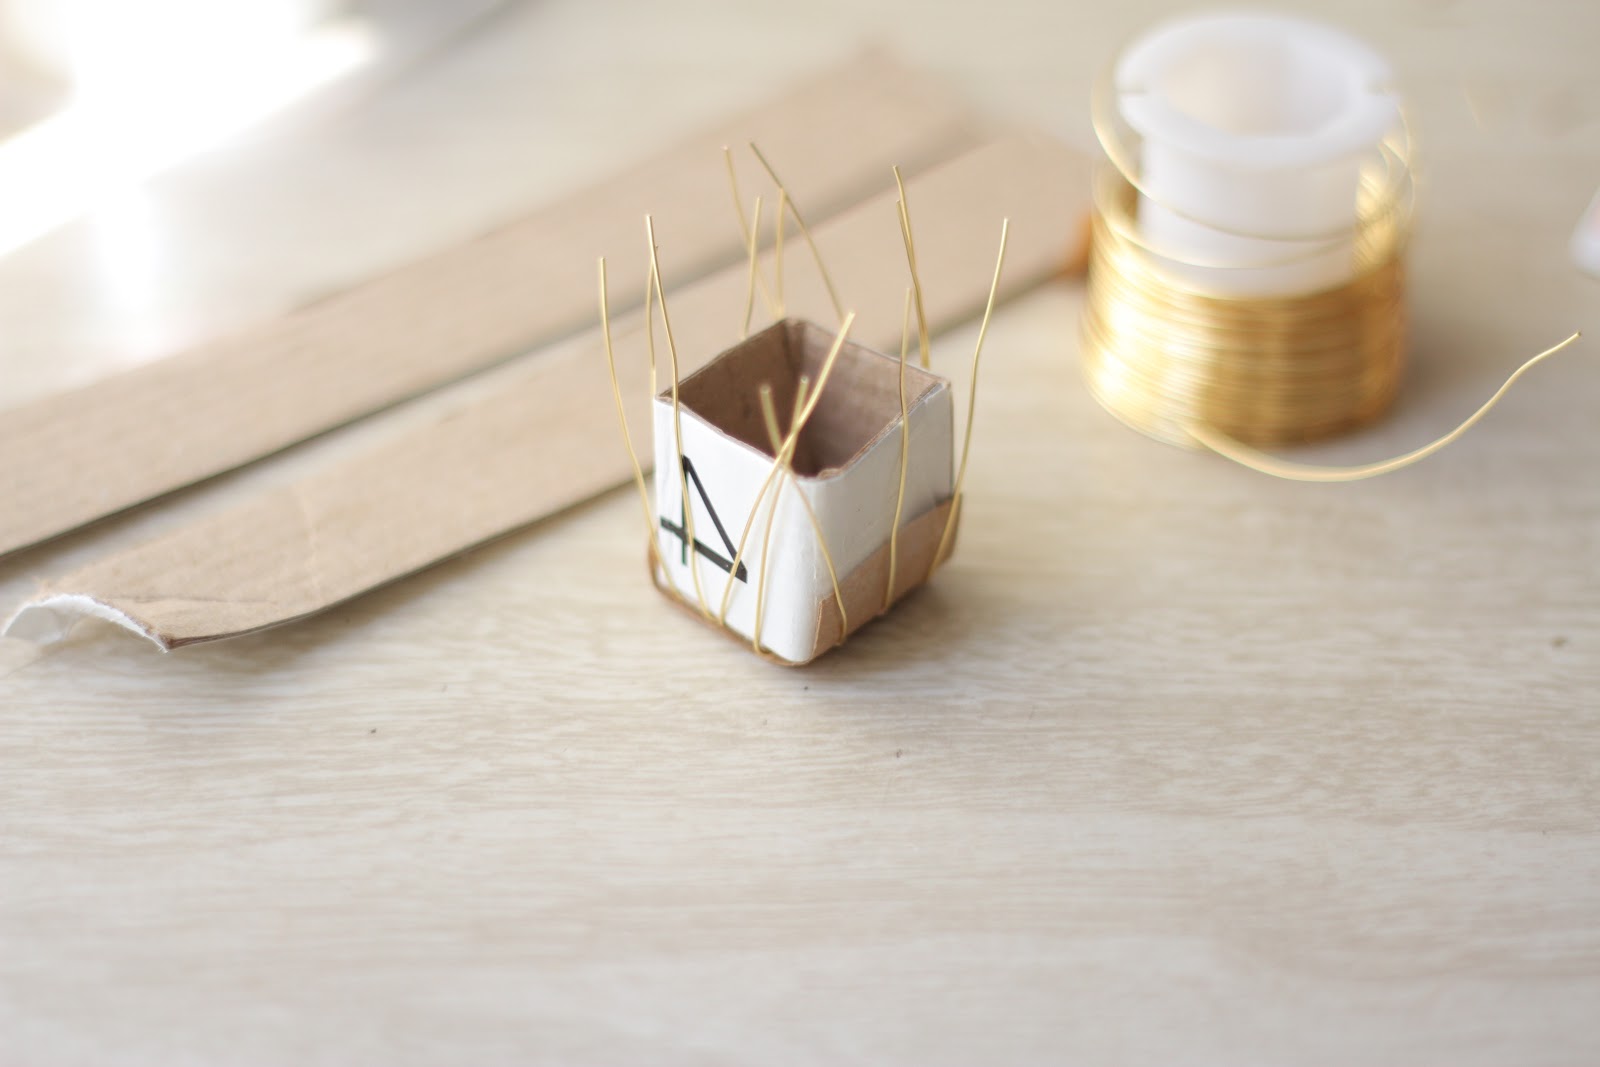
For the original ballons (my first attempt), I used a small wood block as the interior of the basket. On this version I decided to construct a small cardboard box for the basket.

This was really easy to make; just cut a strip of cardboard and fold it into four smaller squares. Attach a separate square for the bottom. If this doesn't make sense, which is definitely possible, let me know and I'll post a tutorial.

Once you've created the box, tape on a small piece of brown paper bag. Then cut three 2-2.5 inch pieces of wire. Pierce the brown paper bag with the wire and fold the wire up toward the box opening as shown. Try to space the wires evenly.

Cut four more pieces of wire the same lengths, this time slide them under the brown paper bag. These wires will try to move a bit when you first start weaving, so make sure your patience is locked and loaded.
Now that the makeshift loom is ready, let's start weaving!

It doesn't matter which side you start on, but since you'll be weaving, you need t make sure to stay on course with the over/under pattern. FYI: on one of the corners you'll have an over/over or under/under. But that's fine--it's not noticeable.

After you finish weaving one row, hold the yarn in place with your thumb while weaving the second row. Weave loosely, and once the yarn is in place you can tighten the row before moving on. Continue weaving to the ridge of the box.

When you are finished weaving, cut a 5 inch tail and thread the end through a yarn or tapestry needle. (I like the tapestry needle because it's metal.) If you don't have either of these on hand, you can pick them up for a couple dollars at a craft or knitting store. From the corner where you finished your weaving, slide the needle under your yarn work and out the bottom; cut off the remaining tail as close to the basket as possible.

Clip the wires down and fold them over inside the basket. This will help hold your top row in place.

After you've folded down your wires, get some white yarn and crazy glue. I used cream yarn from Sugar n' Cream. Just glue down one piece of yarn along the top ridge. My fingers did get a bit sticky, but the effect was well worth it.

Now that the basket is complete all that's left is to attach the balloon. I used the same yarn as the basket but separated it to create a thinner more rope-like piece. Cut a piece about 10-12 inches and thread your tapestry needle.

This time you'll go from the bottom of your basket up.

After threading your rope on one corner, use the remaining tail to thread up through the opposite corner on the diagonal. Repeat on the two remaining diagonal corners. Once you've completed this step, you should have four relatively equal pieces of yarn coming out of each top corner of your basket.

All these tails should be the same length before you attach the balloon.

This next part was a little tricky; you have to balance the balloon on the basket and tie off the ropes on top.

Once you get the knot tied, you may have to adjust the ropes a bit so your basket hangs evenly from your balloon. But it's all worthwhile when you see your hot air balloons fly!


Fin.
Amazing!
ReplyDeleteThanks Jaci! I really had fun with these, that's why there's a thousand photos posted of them.
DeleteLove love love this! Will definitely be making some. There's a real wedding craze just now for hanging flower centrepieces but can you imagine hanging these instead?! Now to get that proposal...!
ReplyDeleteI think hanging hot air balloons for a wedding would be absolutely magical. What a stellar idea, Jenna!
DeleteThanks for sharing this wonderful idea. I've been planning on making something really good for our promotional giveaways.
ReplyDeletepromotional products in miami
If you are planning on making several get a team of really patient people and play some ocean sounds while you make them. But I think this would be a really cute promotional item. Good luck Alexis!
DeleteIt would be cool If you replaced the Cardboard ball
ReplyDeleteInto a Helium Ballon :D!
Whoa. That would be SO awesome.
DeleteFantastic article, it’s very comprehensive and exciting! it’s so helpful to me, and your weblog is very good. I am definitely going to share this URL with my friends. Just bookmarked this site.!
ReplyDeleteHi! We love this and have added it to our round-up of great Hot Air Balloon crafts! Hope thats OK xx
ReplyDeletehttp://buttonsandpaint.blogspot.co.uk/2013/07/hot-air-balloon-crafts.html
Of course, thank you!
DeleteOf course, thank you!
DeleteVery good idea for babyroom decoration! Nice tutorial for the basket. Thanks from bcn.
ReplyDelete"I can't get enough of this blog's beautiful visuals and captivating storytelling. The author has a way of transporting readers into the worlds they create, leaving us spellbound. It's a pleasure to indulge in their imaginative narratives and explore new ideas through their writing."
ReplyDeletehttps://promocodehq.com/all-stores
"I want to commend the author for their consistent commitment to providing value to readers. Whether it's through practical tips, insightful analysis, or thought-provoking discussions, this blog never fails to deliver. It's evident that the author genuinely wants to make a difference in their readers' lives."
ReplyDelete2 for 1 flamingo land vouchers
The DIY hot air balloon centerpiece is a true testament to your ingenuity and resourcefulness. The way you transformed everyday materials into a whimsical decoration is simply awe-inspiring. Aintpayingfull represents the spirit of creativity and resourcefulness, enabling us to reach for the stars without breaking the bank.
ReplyDeleteThank you for embodying the spirit of frugalishness and reminding us that the sky's the limit when it comes to crafting unforgettable experiences. Your blog continues to be a source of inspiration for those of us seeking innovative ideas to make our lives more magical, even on a budget.
ReplyDeleteI appreciate your blog post about going "up through the atmosphere, up where the air is clear." It's a poetic and inspiring read. And for those seeking to embark on their own high-flying adventures, keeping an eye out for Use Promo Codes can lead to discounts on travel essentials, making the journey even more exhilarating. Thanks for sharing this beautiful piece!
ReplyDeleteNice post. Thank you to provide us this useful information.
ReplyDeleteLooking for the best balloon decoration in Patna . Funtook offers stunning and creative balloon setups for birthdays, weddings, baby showers, corporate events, and more! Their expert team transforms any venue with unique designs, making your celebrations unforgettable. Book your decoration now at Funtook and add a magical touch to your special moments.
ReplyDelete